
OAuth setup
Setting the OAuth configuration for your eLabNext integration.
Use OAuth with your integration
Using OAuth to integrate your application allows users to securely access and interact with it directly from within eLabNext. This integration method ensures that user authentication and authorization are handled seamlessly, providing a smooth and intuitive experience with the new feature(s) that your integration provides.
OAuth settings
External application settings
On the side of your external application, two actions need to be taken to set up the OAuth integration process. These are:
- Registering the eLabNext integration plugin
- Setting the redirect URL:
https://developer.elabnext.com/api/v1/oauth2/redirect
When you have registered your integration plugin, you will receive a client ID and a client secret. These credentials are essential for setting up the OAuth authentication and will be used as settings on the eLabNext side.
Settings on eLabNext side for your OAuth configuration
Using the Developer Platform to release your add-on allows you to manage the OAuth 2.0 settings for your integration. You can enable this functionality under the Authentication tab when managing your add-on (version).

With the authorization functionality enabled, you will be presented with the required information fields to get your OAuth 2.0 authorization working. The testing account credentials are optional, and can be provided to assist with testing purposes of the integration. These should be credentials for a dedicated test account that you are comfortable sharing and that is set up specifically for testing purposes. These credentials will only be used for integration testing, stored securely in the Developer Platform environment, and will not be shared with third parties.
With the exception of the client secret field, all OAuth settings become immutable once the add-on version is released to the Marketplace. This means that if any changes need to be made to these settings, you will need to create a new add-on version. However, since client secrets typically have expiration dates and require periodic rotation for security purposes, the client secret can be updated in released add-on versions. This can be done using the Reset button next to the client secret field, allowing you to input the new secret value.
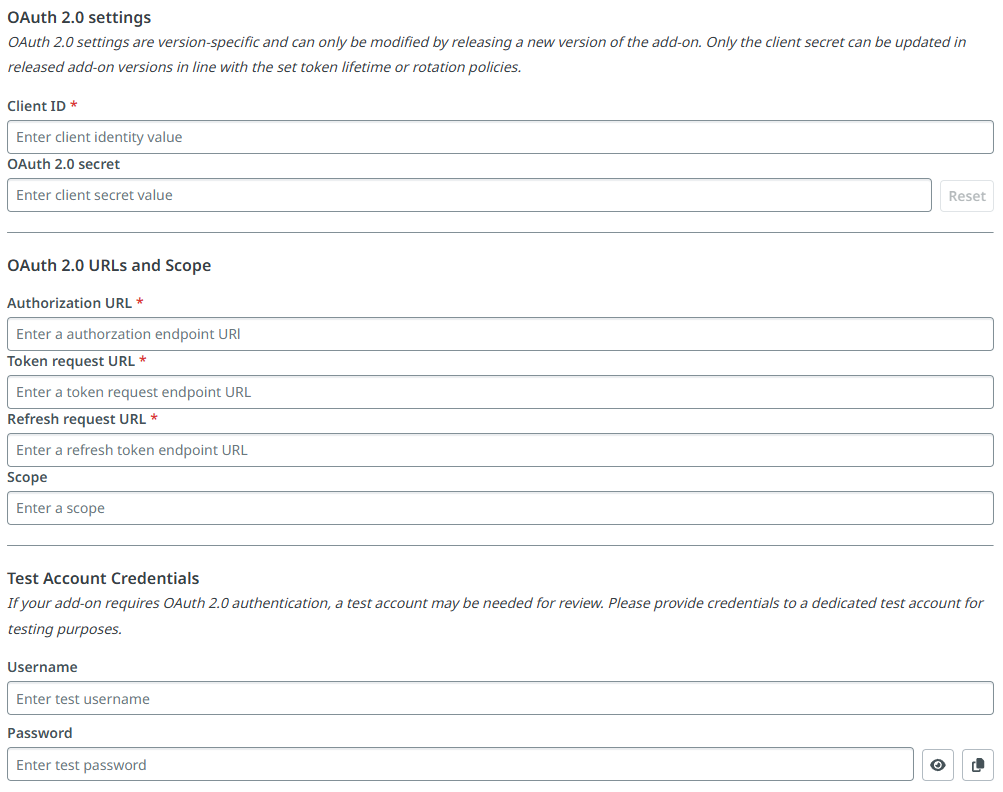
OAuth field configuration
The configuration form contains several required fields that need to be completed for your OAuth integration:
Client credentials:
- The client ID and client secret are obtained during plugin registration with your external application (as described in the External application settings section above)
OAuth endpoints:
- The required URLs (authorization URL, token URL, etc.) can be found in your external application's API documentation
Access permissions:
- The scope field is optional and determines what permissions users will grant to your integration - configure this based on the specific rights your add-on requires to function properly
All of these settings work together to establish the secure OAuth flow between eLabNext and your external application.
Developing your OAuth integration add-on
With your OAuth configuration in place for your add-on, it can now be used to do the authorization process for users. The below example recipe shows how you can fetch the OAuth settings for your add-on, and how the access token that is generated for a user during authentication is then stored. With this you can then create the functionality for your integration.
Updated 7 months ago